There is one address book for your organization, and it is available to every user who has been given permission to Secure Messaging.
By default, there are no individual or group contacts in Secure Messaging. They must be added individually. You need the Manage address book permission to do so. This permission is assigned to you by your Novari ATC administrator.
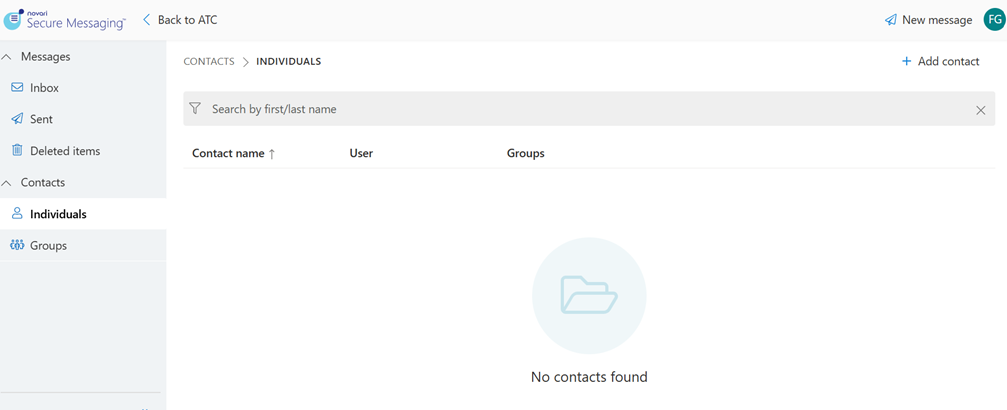
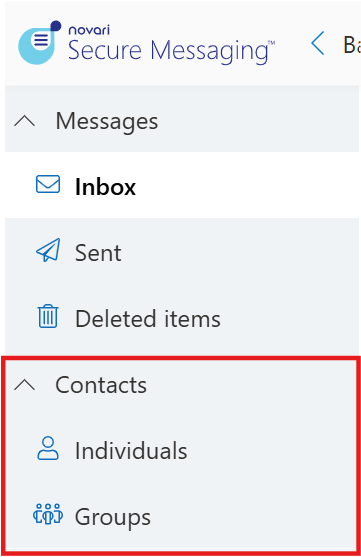
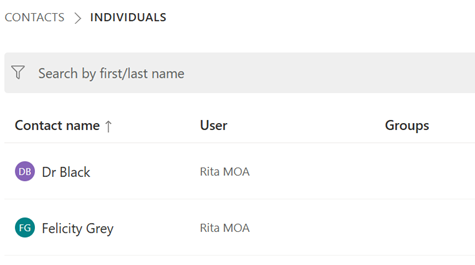
There are three two types of contacts: Individuals and Groups.
Step one: Create your individual contacts
Select Individuals
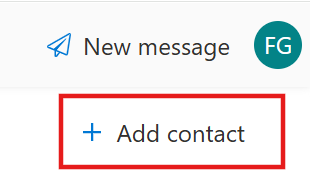
Select Add contact
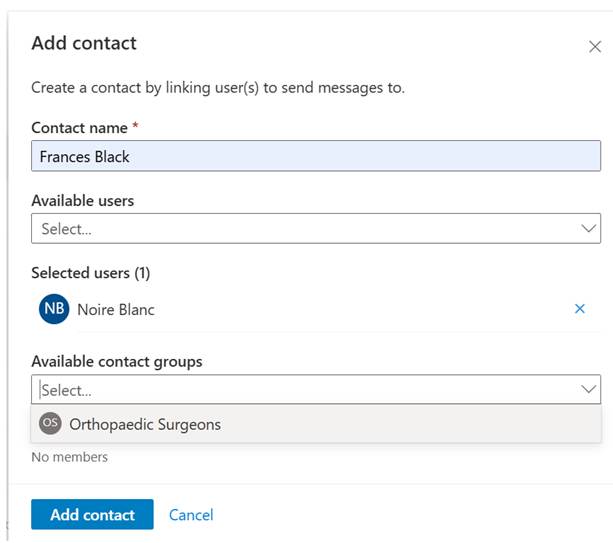
Enter a name for the contact. This could be any name that makes it easy for others to understand. Contact name is mandatory.
Select a user.
Optionally, select a contact group to add the new contact to. This saves steps so you do not need to navigate to that contact group to add the new contact.
Select Add contact to create the contact.
Step two: Optionally, set up contact delegation
Novari ATC Secure Messaging supports the concept of contact delegation, similar to many email clients. For example, Rita, the medical office assistant, works for two orthopaedic surgeons, Drs Grey and Black, who share an office. She is added to their contacts so she can read and respond to messages on their behalf.
Similarly, Isabelle used to work for an orthopaedic surgeon, Dr Brown, in another clinic. She was recently hired to work with Rita. Isabelle used to manage Dr Brown’s messages. She was removed from that contact and given access to the two surgeons’ contacts in Rita’s office.
Anyone with the Manage address book permission can add contacts to a contact to delegate the management of an individual’s messages to other individuals.
Step 1 – Create the individual contacts (we’ll use the above examples to illustrate)
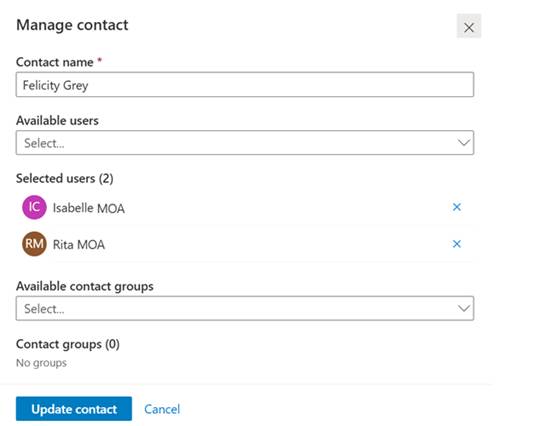
Add Felicity Grey and Dr Black as contacts and add Rita as the user to each. Rita can read and respond to messages sent to either Dr Black or Felicity Grey.
Edit Felicity Grey’s contact to add Isabelle. Now, whenever someone sends a message to Felicity Grey, both Isabelle and Rita will see it and can respond.
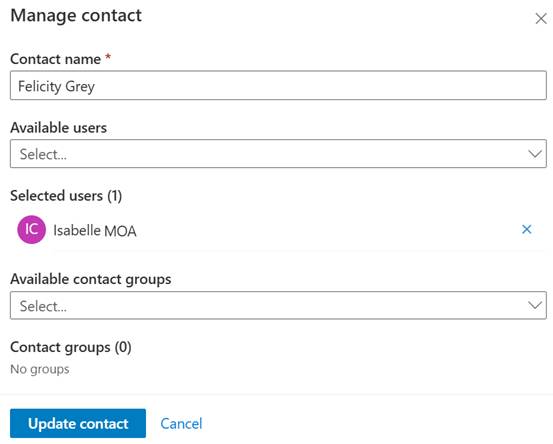
Lastly, Rita leaves Felicity Grey’s office. Remove her from Felicity Grey’s contact.
Rita will no longer be able to see any of Felicity Grey’s messages.
Step three: Optionally, create your contact groups
You can create groups of users. This is helpful when you want to build lists for broad distribution. At least one contact must exist before you can create a contact group.
To create a contact group
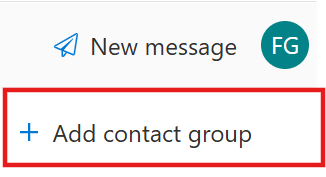
Select Groups
Select Add contact group
In Add contact group
Enter a group name
The group name is mandatory
Select at least one contact
Select Add contact group to save your changes

Removing a user from a contact
A contact can have more than one user linked to it. For example, Dr Felicity Grey has two medical office assistants, Rita and Mona. Mona leaves to join another clinic. She is removed from Dr Felicity Grey’s contact and no longer has access to any of Dr Felicity Grey’s messages.
To remove a user from a contact:
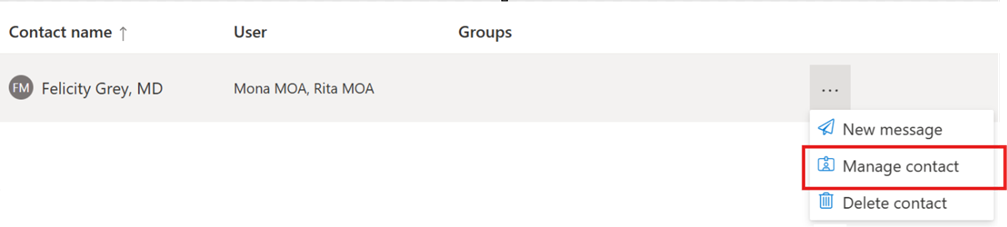
Select the contact from Individuals
From the More options menu for that contact, select Manage Contact
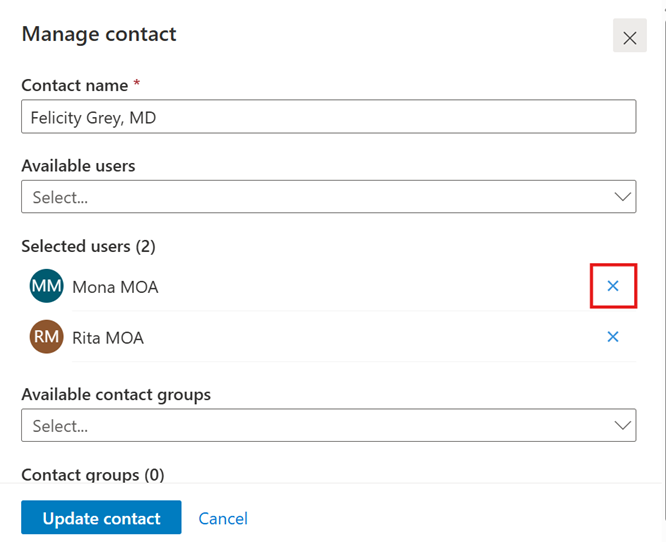
Select the X to the right of the user you want to remove from the contact.
The user is removed.
Select Update contact to save your change.
Note: There must be one user or one group in the contact
Delete an individual contact
You can delete an individual contact. For example, Jennifer Pringle no longer works in the orthopaedic surgeons’ clinic.
To delete a contact
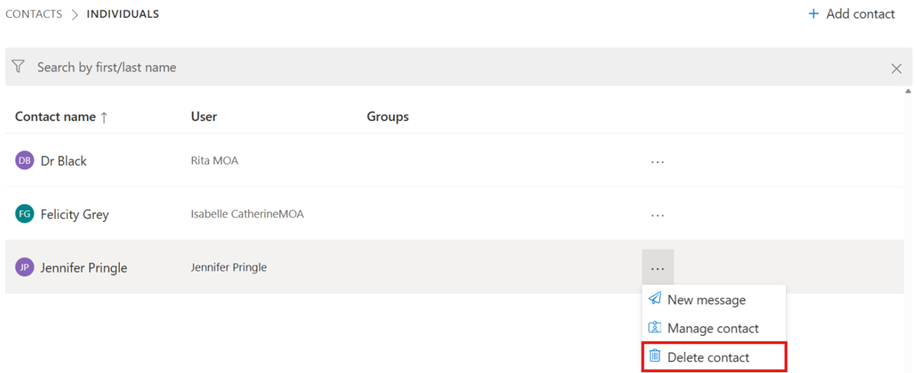
Select the contact from Individuals
From the More options menu the contact, select Delete contact
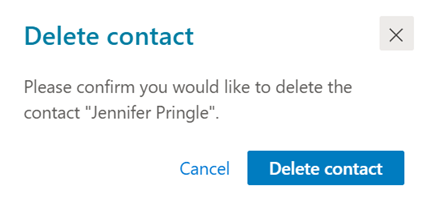
Confirm the contact deletion or select Cancel to not delete it
The contact is deleted from the list of Individuals
Was this article helpful?
That’s Great!
Thank you for your feedback
Sorry! We couldn't be helpful
Thank you for your feedback
Feedback sent
We appreciate your effort and will try to fix the article